Friday, May 31, 2013

You Say Vaaahhz, I Say Vase


Pretty much anything that will not tip over, I like to use as a vase.  Single stems are the perfect embellishment to a smaller necked bottle.  I place them in corners, on shelf ends, side tables, stacks of books, bookends and anywhere that the eye may fall when glancing about a room.  I do not adhere to flowers being a centerpiece.  Although they have great influence over the atmosphere in a room front and center, they can also create delicate ambience throughout a space when tucked in less obvious places.  Brightening up an antique trunk or sitting pretty on a footstool, an unassuming container is a breath of freshly flowered air to its inhabiting stems.

  These are some of my favorites that I stash on such stools, trunks, corners, sills, ledges, books, benches and anywhere I can add a dash of lovely!


I have also spray painted mason jars for displaying.  I prefer the old-fashioned versions with the metal tension seals.  By the way, I am not displaying flower corpses-I am drying them.  I think dried arrangements are as elegant as fresh displays.  The rose in photos below is almost done and stayed quite vivid.


My teapots and pitchers typically grace more centrally located spots since they are larger and need a steadier stand.


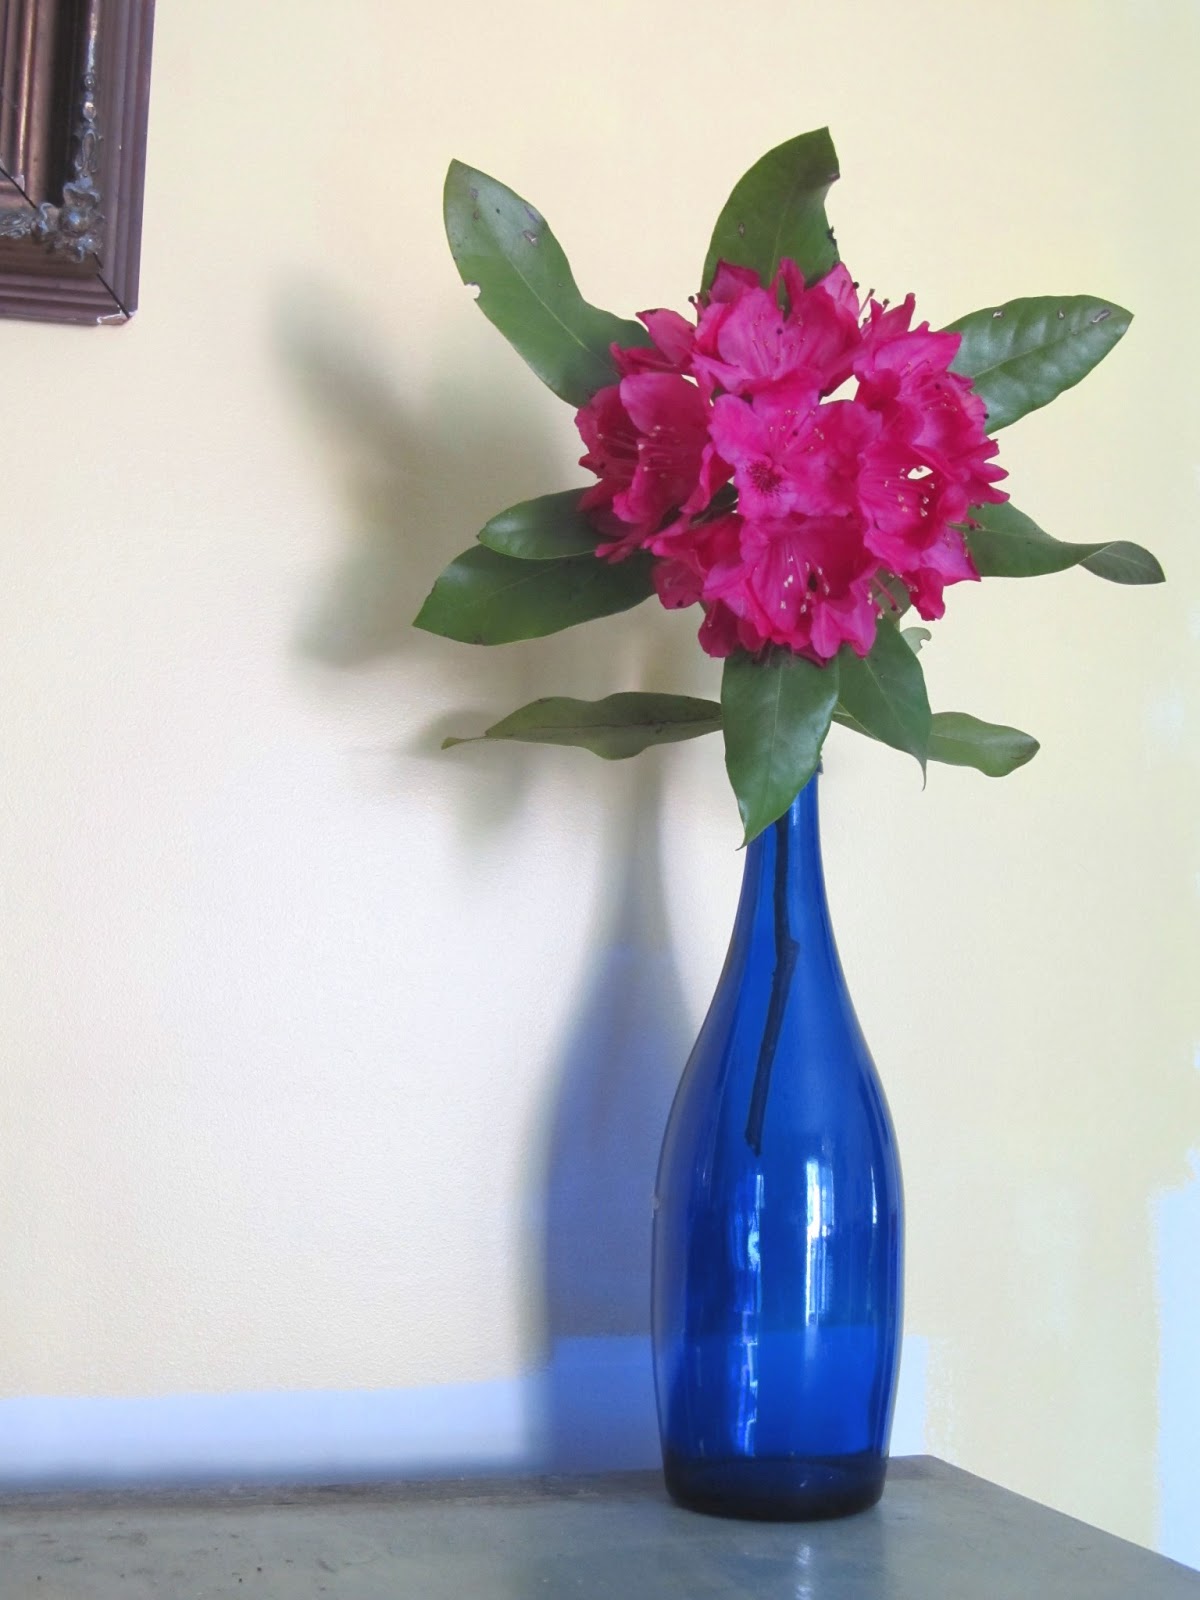
I found this cobalt blue bottle at the Salvation Army.  The misted bottle was found in my older house's back yard, and the other little one to the left was a Goodwill grab.


Even though I think my antique book collections are beautiful in their own tattered way, I love to dress them up with a dollop of fresh prettiness.


 Here are some ideas for treasure spots around the house where flowers or even empty vases or bottles love to humbly abide:


Even if you are the only one who will see or them, you are worth the perk-me-up of a stolen moment inhaling their delicate aroma and gazing at their forget-the-world beauty as you continue along your everyday path.


I am a big blender of old and new, and here is an example of it above.
My grandmother's pitcher accompanying a newer tray on an antique trunk in front of a newer loveseat.  To me, style is not about making everything match or even closely coordinate.  I think it is using pieces together that will add a strikingly opposing type of complementary effect. The elements will play off of each other so as to showcase the spectacular qualities of the individual pieces within the collective whole.   


Thursday, May 30, 2013

Ok, So I Wish I Lived at Downton Abbey


I would be a maid, or a governess, or a gardener, or a tree in the yard...just get me on that estate!

Huge fan of the show.  The landscapes, the rooms, the furnishings, the antiques, the DRESSES, the manners, the simplicity, the duplicity... I could go on and on - kind of like Violet's view of parenting, ha!

This hat was a splurge for me at the Cape several years ago when I was headed to the beach sans visor or sunglasses.  I love the big black bow tie.  The blouse is about a hundred years old from The Limited.  It is tissue thin and billows and flows.  Gorgeous.  The skirt is a cotton gauze maxi from TJMaxx many moons ago.  The shoes are recent and I loved the spunky contrast to the more graceful garments.  I had wanted them in black, but they were sold out, so I tried the white. 


 I could not resist adding this dainty floral embroidered vest from Ann Taylor.  The satin waist tie is precious.  I love the overall femininity of the entire outfit including the edgier shoes.  One way to ensure that flounce and femininity is balanced and contemporary in an ensemble is to add an element of sass or modernity.  Now where did I place my parasol? Wink.


Skirt: TJMaxx, Blouse:  The Limited, Vest:  Ann Taylor, Shoes:  Shoemint, Hat:  a vacation splurge


Wednesday, May 29, 2013

Stirring Things Up

My afternoons and evenings are usually more hectic than my mid-mornings.  After I rustle my kids all out the door, they return home in the early afternoon from school buzzing into the kitchen to descend upon the cabinets and fridge like ravaging locusts.  Then I must rustle them all out the door again.

As I am shuffling the kids to obligations and playing pingpong with pickups, drop-offs, and stay-to-watch events, if I haven't precooked and brought insulated containers full of dinner on-the-go, my brain is swirling with configurations of what will be quick and decent for when they return and descend upon the cabinets and fridge like ravaging locusts...again.   Of course, I want to make something healthy and hardy, but I also want fewer cooking utensils = less cleanup = less late night scrubbing of crusted over dishes and pots.  Here is a simple dish I throw together often.  It is easy to omit or substitute ingredients when creating, so suit it to your taste.  Its a breezy stir-fry. And it uses only one pot!

List of Ingredients:
Pork loin
Vegetables (carrots, broccoli & cauliflower)
Brown rice (precooked - great to make ahead and store portions for several uses) or use the
     quick-cook kind and boil it in the pot before adding pork and oil to sauté.
Soy sauce
Garlic
Ginger
Nutmeg
Water

Time: approx. 20 min.

For my family of five, I use:

  • 1tsp. olive oil drizzled in large non-stick sauté/dutch oven pan.  Mine is a Calphalon and it is AMAZING.  I didn't even have to splurge for it.  My mommy gave it to me for Christmas :)
  • 1/4 Lb fat-trimmed pork loin diced to 1/2 inch cubes.  Saute until turning white, but not cooked completely through.

Then to SAME pot I add:
  • 1 Lb frozen cauliflowers florets/cuts
  • 1 Lb frozen broccoli florets/cuts
  • 3 tablespoons diced garlic
  • 1/3 cup soy sauce

My mega cartons of stuff

Broccoli, cauliflower, garlic, soy and pork:


Combine and sauté about 5 minutes, adding a couple tablespoons of water to create a slight steam bath:


Dump on top:
  • 2 cups brown rice precooked.  My brown rice looks pale, but its brown alright.

Stir around to incorporate rice into soy/garlic sauce and vegetables:


 Once the first vegetables are getting tender and pork is thoroughly cooked, I add:
  • 1 cup chopped fresh carrots
  • a shake of nutmeg
  • several shakes of ginger
I like my vegetables like pasta-al dente.  Especially carrots. So this method preserves the integrity of the crunch for carrots and a mild firmness for the florets:

Keep stirring to shift the rice.  Saute approx 5 more minutes:


Stir in nutmeg


Stir in ginger to taste


 Sit. Relax. Chow.


*permission to leave dishes till tomorrow :>

Saturday, May 25, 2013

Sugar Cookies Baby!

In case you want a rainy Memorial Day weekend project, this one is perfect especially for kids.  We have an occasion at church for which I was asked to make some cookies.  One of my favorite things to do is design/create baked treats.  I can spend hours dreaming up flavor combinations with pretty adornments for cupcakes, quick breads and cookies.   A secret dream of mine (not so secret now) would be to open a little book/bake shop!  I became completely enamored with cookie decorating early last fall.  It swept my bare feet right off the kitchen floor.  What an array of style and design options from basic colored icing to stenciling, paper overlay, airbrushing, and sparkly sprinkles!  Anything you can think of can be designed into a cookie.  Infinite creative possibilities. In this abridged tutorial, I am working with basic shapes and decorating techniques.  When I do more elaborate ones, I will share those as well. 

Start with a basic sugar cookie recipe.  I have used both chilled and straight from the mixer recipes.  Either are perfectly fine, it is really a personal or time preference.  For these, I used a non-chilled recipe.

I don't know why this is flipped.  In my jpg file it is rotated the right way.  I have been trying to correct it for half an hour and am completely irritated by the thing.  Sorry...but you get the gist.


If anyone is interested in the recipes for cookies and royal icing, comment to me and I will gladly post them.

Things you will need:
  • A stand mixer (because you don't want to have to hand whip the icing for 7 to 8 minutes, but if its all you've got, by all means...)
  • Containers with airtight seals
  • Either bottles or pastry icing bags with #1 and #2 tips with couplers
  • A mini piggy spatula :)
  • food coloring of your choice
  • A batch of royal icing,


  • measuring cups with pour spout to fill bags/bottles (if you want to scoop instead, go for it)
  • toothpicks,


    • And for the lady behind the mixing bowl- a frilly apron!


    Once your icing forms stiff peaks on the whip when held up, it is time to stop whipping.  You now have piping icing.  It will look like this: 


    This is also referred to as 20 second icing.  Here is where I divide mine into containers for coloring.  Once divided you can color and loosen the consistency for use as "flood" icing if you are using it for that.
    Flood icing should be at the 10 to 15 second timing which is what you will fill in your outlined cookies.  In order to know what type of icing you have made, simply plop a spoonful onto itself and count how many seconds until it blends back in.  Highly scientific methodology. Like this:

    start counting as soon as it hits the surface one, one-thousand, etc.

    Using the measuring cup, take your piping icing (20 second) and fill a bottle/bag with it and add a #1 tip.  Hold it about 1/8 inch above cookie and begin to squeeze lightly while moving around perimeter of cookie.  Like this:


    Now take the "flood" icing and pour it into a bottle/bag and #2 tip and fill it in for the most part.  Like this:


     Take your toothpick (I couldn't find mine so I improvised with a flower pin tool) and gently push icing around to smooth in areas.  Like this:


    My pictures keep flipping and it's flipping annoying!  I need a new camera, computer and photo editor.
    Anyway, cookie should look like this and will dry smooth.


    Color your divided icing as you choose.  At this time, if you are using it as flooding icing add a few drops of water to loosen.  Do it a drop at a time as one drop too many and you have to add sugar and the vicious cycle is started:

    Mix well and voila! Beautiful color.

    Piggy is proud of his hard work.

    Fill your bottles/bags with each color and use a #1 tip for detail colors and a #2 tip for flooding colors. Keep the rest in storage containers which will last a couple of weeks so you can have time to make tons of cookies!


    Then,

     HAVE FUN!


     Eventually, your batch will look like this (with your own design):


     This is the mobile home for my treats' décor and equipment.  I prefer a rolling cart so I can easily transport it from utility room to kitchen and back:


    Tips and couplers:


    Food dies and  glitter dusting powders all edible only:


    Sculpting tools and oil free extract flavors


    Bags, bottles and other necessities:


    Sparkles, sprinkles, beads, glitter sprays and toppers all edible only:


    SOME of my cookie cutters.  The rest are in boxes:


     Airbrush liquid and cupcake liners, plenty of happy florals and polka dots in here: